The Hidden Dangers of Vacant Homes: Edmonton Snowbirds and the Risks of Dry Wax Seals in Toilets

Every winter, a significant number of Edmonton, Alberta, residents—commonly known as “snowbirds”—migrate south to escape the brutal Canadian winters. While this seasonal exodus to warmer climates like Arizona, Florida, or Mexico provides a much-needed respite from snow and ice, it also leaves homes in Edmonton unoccupied for extended periods. One of the most overlooked issues resulting from this is the drying out of toilet wax seals in these vacant homes, which can lead to severe water damage, mold, and even the need for extensive tile and substrate repairs.

Understanding the Snowbird Phenomenon in Edmonton

Snowbirds, typically retirees or semi-retirees, choose to spend the winter months in warmer regions to avoid the discomfort of Edmonton’s long, harsh winters. This lifestyle, while idyllic, requires homeowners to leave their properties vacant for several months—usually from November to April. During this time, the homes are left without the usual maintenance and checks, creating the perfect storm for various issues to arise, particularly in the plumbing and flooring areas.

The Role of the Toilet Wax Seal

A toilet wax seal is a critical component in any bathroom, sitting between the toilet base and the flange on the floor. This ring of wax forms a watertight seal, preventing water from leaking out when the toilet is flushed and blocking harmful sewer gases from entering the home. However, this seal depends on regular use and moisture to remain effective.

The Problem with Vacant Homes

When a home is left unoccupied for months, the water in the toilet bowls and traps evaporates. This evaporation causes the wax seal to dry out and lose its flexibility. Without the necessary moisture, the seal can crack or become brittle, leading to a compromised seal. As a result, when the homeowners return and flush the toilet for the first time, water can leak from the base, leading to potential water damage and even more serious problems like mold growth and structural rot under the tile flooring.

The Risks of a Dry Wax Seal

The primary risk associated with a dry wax seal is water leakage, which can lead to substantial damage if not addressed quickly. Initially, the leak might be slow and almost undetectable, but over time, it can cause significant harm to the flooring, subflooring, and tiles. As a company specializing in tile installation and repair, we’ve seen firsthand the extent of the damage that can occur when these leaks go unnoticed.

Key Issues Arising from Dry Wax Seals:

1. Water Damage to Flooring: Prolonged water exposure can weaken and damage not only the tiles but also the underlying substrate, leading to loose tiles and even the need for complete floor replacement.

2. Mold Growth: One of the most common issues we encounter is mold developing underneath the tile. Mold thrives in damp, dark environments, and a slow, hidden leak from a compromised wax seal creates the perfect conditions for mold to spread, potentially causing health risks and necessitating expensive remediation.

3. Rotting of Substrate: The substrate, or the material beneath the tiles, can rot if exposed to moisture for an extended period. In some cases, the entire substrate may need to be removed and replaced, which is a labor-intensive and costly process.

4. Extensive Repairs and Renovations: When water damage is severe, it may require the demolition of existing tiles, treatment of mold, replacement of the rotted substrate, and installation of new tiles. This not only drives up the cost but also increases the time your home is out of use.

Real-Life Impact: A Case Study from Our Experience

At The Tile Installations Specialists, we recently handled a project that perfectly illustrates the dangers of dry wax seals for Edmonton snowbirds. The homeowner had left their property vacant for several months while wintering in Arizona. Upon their return, they noticed water pooling around the base of the toilet and immediately contacted us for an inspection.

Before Renovation

During our initial assessment, we discovered that the toilet wax seal had dried out, leading to a slow, undetected leak. Over the months, this leak had caused significant water damage to the tile flooring, and mold had begun to grow beneath the surface. Worse, the moisture had also led to the rotting of the wooden substrate underneath the tiles.

During the Process

We began by carefully removing the tiles to expose the extent of the damage. As suspected, the mold had spread extensively, and the substrate was beyond repair. Our team undertook the task of safely removing the mold and completely replacing the damaged substrate.

Replacing the Substrate

Once the mold was treated and the substrate replaced, we proceeded with re-tiling the floor. We used high-quality tiles and grout to ensure durability and to restore the bathroom to its former condition.

Finished Project

The final result was a beautifully restored bathroom, free from mold and water damage. The homeowners were relieved to have the issue resolved and were extremely satisfied with the quality of the work.

If you happen to be in this situation go here and request an estimate and we are happy to walk you through the process.

Preventative Measures for Snowbirds

To avoid the risks associated with dry wax seals, and the extensive damage they can cause, Edmonton snowbirds can take several preventative steps before leaving for their winter retreat:

1. Turn Off the Water Supply: Shutting off the main water supply and draining the pipes can help prevent leaks during your absence.

2. Add Water or RV Antifreeze to Toilet Bowls: Adding RV antifreeze to the toilet bowls and traps can prevent water from evaporating, keeping the wax seal moist.

3. Seal the Toilet Bowl: Placing plastic wrap or a specialized cover over the toilet bowl can slow evaporation. When combined with antifreeze, this method can protect your wax seal throughout the winter.

4. Arrange for Regular Home Check-Ins: Having someone check on your home periodically can help detect issues early. Regular flushing of toilets during these visits can prevent the wax seal from drying out.

5. Upgrade to Advanced Toilet Seals: Consider replacing traditional wax seals with newer materials like rubber or foam gaskets, which are less prone to drying out and offer a more durable solution.

Addressing the Problem Upon Return

If you return from your winter escape and find that your toilet is leaking, it’s essential to address the issue promptly to avoid further damage:

1. Inspect for Leaks: Check the area around the toilet base for signs of water leakage. Look for damp spots, loose tiles, or musty odors indicating mold growth.

2. Replace the Wax Seal: If you detect a leak, the wax seal likely needs replacement. This involves removing the toilet, scraping away the old wax, and installing a new seal. Given the complexity, hiring a professional plumber or tile specialist is often the best course of action.

3. Assess the Extent of Damage: After replacing the seal, it’s crucial to inspect the surrounding flooring and substrate for any signs of water damage or mold. If damage is present, professional remediation may be necessary, including the removal and replacement of tiles and the underlying substrate.

4. Consider Full Restoration Services: If your home has sustained significant damage, our company offers comprehensive restoration services. We handle everything from mold treatment and substrate replacement to re-tiling and reinstallation of bathroom fixtures, ensuring your home is safe, sound, and beautiful.

Conclusion

For Edmonton snowbirds, the joy of escaping winter’s chill comes with the responsibility of ensuring their homes remain protected while unoccupied. One of the most significant risks involves the drying out of toilet wax seals, which can lead to leaks, mold, and extensive damage to the tile flooring and substrate.

By taking proactive steps before leaving and addressing any issues promptly upon return, you can protect your home from the hidden dangers associated with dry wax seals. If you do find yourself facing water damage, mold, or rot beneath your bathroom tiles, The Tile Installations Specialists is here to help. We specialize in restoring damaged bathrooms to their former glory, ensuring that your home is ready to welcome you back from your winter retreat without a hitch.

Master Tile Installation in Edmonton, Alberta: Integrating Schluter DITRA-HEAT Systems for Optimal Bathroom Comfort

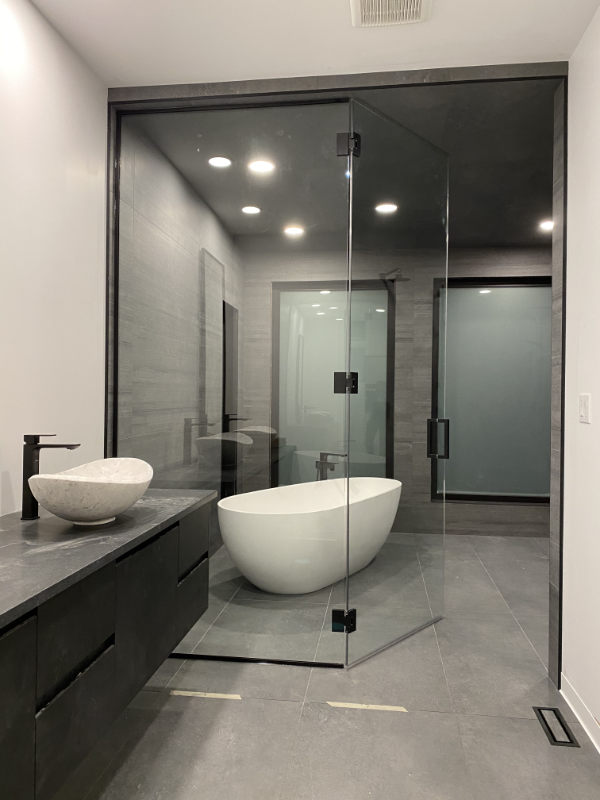
When it comes to tile installation in Edmonton, Alberta, ensuring both aesthetic appeal and functional performance is paramount. One innovative solution transforming bathrooms across the city is the integration of Schluter DITRA-HEAT systems. This electric floor heating system not only enhances your comfort but also plays a crucial role in maintaining a healthy bathroom environment. In this article, we’ll delve into the benefits of combining electric floor heating with expert tile installation and how this synergy can elevate your bathroom’s functionality and appeal.

Table of Content

The Excellence of Tile Installation in Edmonton

Edmonton is home to many skilled tile installers who understand the nuances of creating visually striking and durable bathroom surfaces. A meticulous approach to tile installation ensures longevity, aesthetic coherence, and resilience against the region’s unique climate conditions. From selecting the right tiles to implementing cutting-edge installation techniques, our services guarantee superior results tailored to your specific needs.

Understanding the Schluter DITRA-HEAT System

Schluter DITRA-HEAT is a revolutionary electric floor heating system designed to provide comfort and efficient moisture control in bathrooms. By integrating this system beneath your tiles, you not only enjoy the luxury of warm floors but also benefit from comprehensive moisture management. This system uses radiant heat to evaporate excess moisture from wet surfaces, significantly reducing overall humidity.

Enhancing Bathroom Comfort with Radiant Heat

Radiant heat offers unparalleled comfort, especially during Edmonton’s chilly winters. Imagine stepping into your bathroom and being greeted by the gentle warmth of heated tiles. The Schluter DITRA-HEAT system spreads heat evenly across the floor, ensuring that every corner of your bathroom remains warm and inviting.

Effective Moisture Control

One of the standout features of the Schluter DITRA-HEAT system is its ability to control moisture levels. Bathrooms are prone to high humidity, which can lead to mold and mildew growth if not properly managed. The radiant heat generated by the DITRA-HEAT system helps evaporate moisture from wet floors and shower steam, reducing the overall humidity. This creates an environment that is less susceptible to mold and mildew, promoting a healthier bathroom space.

Combining Electric Floor Heating with Proper Ventilation

While the DITRA-HEAT system works wonders in managing moisture through heat, it is most effective when combined with proper ventilation solutions. Installing an efficient exhaust fan ensures the removal of moist air, offering an additional layer of moisture control. Together, these systems create a comprehensive approach to maintaining a dry and comfortable bathroom environment.

The Health Benefits of Moisture Control

Maintaining low humidity levels in your bathroom is essential for your health. Mold and mildew thrive in damp environments, and their spores can cause a range of health issues, including respiratory problems and allergic reactions. By incorporating the Schluter DITRA-HEAT system and effective ventilation, you minimize these risks, ensuring your bathroom remains a safe and healthy space for your family.

Aesthetic and Functional Harmony

The beauty of integrating the Schluter DITRA-HEAT system into your tile installation project is that it enhances both aesthetics and functionality. This system is designed to be seamlessly incorporated under your chosen tiles, preserving the visual appeal of your bathroom while adding an invisible layer of comfort and moisture control. Whether you prefer classic ceramic tiles or modern porcelain designs, the DITRA-HEAT system accommodates various flooring options without compromising on heat distribution or efficiency.

Energy Efficiency and Cost Savings

Energy efficiency is a significant advantage of the Schluter DITRA-HEAT system. The ability to precisely control the heating elements ensures that you only use the energy required to maintain your desired temperature. Over time, this efficient energy use translates into lower utility bills. Additionally, the enhanced moisture control reduces the likelihood of costly repairs associated with water damage, further contributing to long-term savings.

Expert Installation in Edmonton

For homeowners in Edmonton, the expertise of professional installers is crucial in achieving the optimal performance of the Schluter DITRA-HEAT system. Our team of skilled technicians is well-versed in both tile installation and the nuances of integrating electric floor heating systems. We pay meticulous attention to every detail, ensuring that your bathroom floor is not only beautifully tiled but also equipped with a highly efficient heating system.

Tailoring Solutions to Your Needs

Every bathroom is unique, and so are the needs of its occupants. Our approach to tile installation and electric floor heating integration is highly personalized. We assess your bathroom’s specific requirements, taking into account factors such as room size, tile type, and existing ventilation systems. This tailored approach ensures that the final result meets your expectations and enhances your bathroom experience.

Long-Term Value and Satisfaction

Investing in the Schluter DITRA-HEAT system for your bathroom tile installation offers long-term benefits. The durability and reliability of this system, combined with the expertise of our installation team, guarantee a solution that stands the test of time. Enjoy the comfort, health benefits, and cost savings for years to come, knowing that your bathroom is equipped with one of the best heating and moisture control systems available.

FAQs

1. How long does it take to install electric floor heating in a bathroom?
Installation times can vary based on bathroom size and system complexity, but most installations are completed within a day or two.

2. Is electric floor heating safe for all types of flooring?
Yes, electric floor heating systems can be installed under various flooring types, including tile, stone, and even some types of vinyl and laminate.

3. Can electric floor heating be used as the primary heat source for a bathroom?
While it can significantly warm the floor and surrounding area, it’s best used in conjunction with other heating methods for overall room comfort.

4. How much does it cost to operate electric floor heating?
Operating costs are relatively low, especially with programmable thermostats that allow you to heat the floor only when necessary.

5. What maintenance does electric floor heating require?
Routine maintenance is minimal—regular cleaning and annual professional inspections should keep your system running smoothly.

Conclusion

Combining expert tile installation with the innovative Schluter DITRA-HEAT system transforms your bathroom into a haven of comfort and health. The radiant heat provided by this system effectively controls moisture levels, creating a space that is less prone to mold and mildew. Coupled with proper ventilation, this synergy ensures a dry, warm, and inviting bathroom environment. For residents of Edmonton, our professional installation services guarantee that you receive the highest quality workmanship, tailored to your specific needs. Experience the ultimate in bathroom luxury and performance with the Schluter DITRA-HEAT system integrated seamlessly into your tile installation project.

Successful DIY Tile Installation: A Weekend Guide for Homeowners

Introduction: DIY Tile Installation

DIY Tile Installation; should I do it? At The Tile Installations Specialists we like to create a sense of awe in everything we do and part of that is transforming spaces with the art of tile craftsmanship. Whether it’s a sleek subway tile for your backsplash or a durable 12×24 porcelain for your entrance, the right tile can elevate your home. But the question we often encounter is: Should you attempt tile-setting on your own? Let’s explore this together.

Table of Content

Know your project

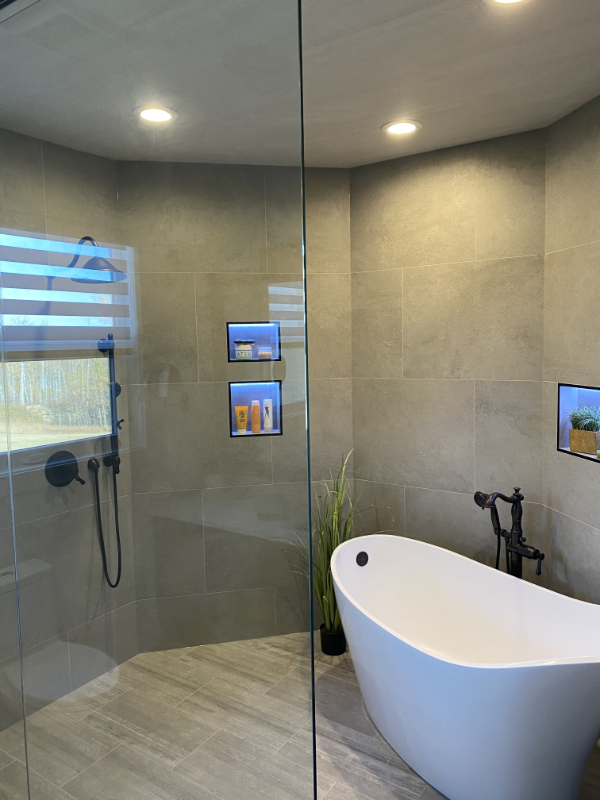
Firstly, understanding the scope of your tiling project is crucial. A small backsplash area in your kitchen? Perhaps a manageable undertaking…. maybe… depending on the tile you choose. However, flooring an entire room or a complex pattern may require precision and expertise beyond casual DIY skills. Here is a blueprint for a major bathroom reno to help you on large projects. Consider the size, location, and purpose of the tiled area. These factors can influence the complexity of the job and the materials needed.

Tools & Materials

DIY tile-setting requires specific tools and materials such as tile cutters, trowels, spacers, mortar, and grout. At TTIS, we utilize professional-grade equipment for precision and longevity. Inadequate tools can lead to uneven cuts, poor adhesion, and ultimately, a less durable finish. For those without these tools, the initial investment can increase the overall cost and complexity of the project.

Skills & Experience

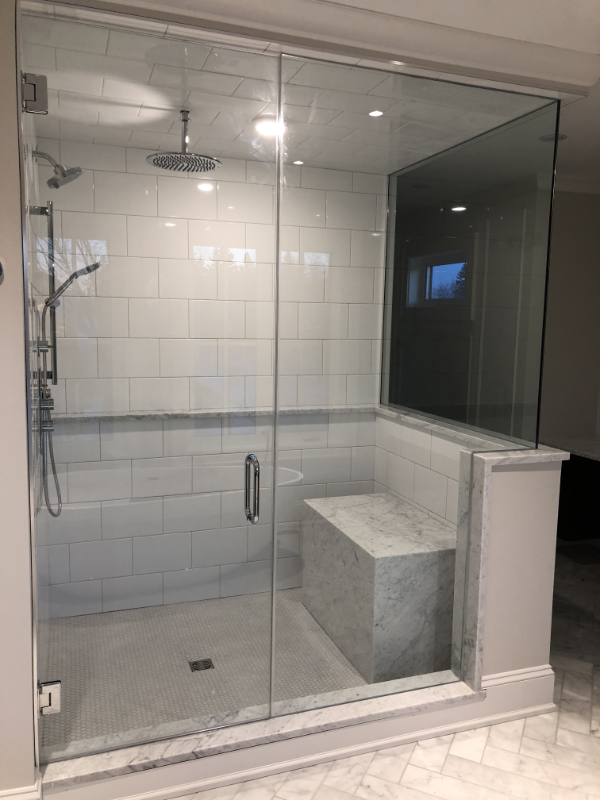
Tiling is an art form. It requires a steady hand, an eye for detail, and experience. As professionals, we’ve spent years perfecting our craft, from understanding how to properly lay out a room to mastering the intricacies of how tile behaves in different conditions (exterior, interior, hot, steam showers, humid areas, enclosed areas). While some homeowners may have a knack for precision work, the experience gap can be a deciding factor in whether a DIY project will have a professional-quality finish.

DIY Tile Installation Skills & Experience

Time Commitment

Consider the time you’re willing to dedicate to the project. Professional tilers like ourselves can tackle a job efficiently, thanks to our experience and focus. A weekend project for a DIYer can quickly turn into a multi-weekend saga with disruptions to your daily life and potentially unsatisfactory results if rushed.

Cost-Benefit Analysis

Cost is often a motivator for DIY, but it’s important to do a thorough cost-benefit analysis. The hidden costs of DIY include tool rental or purchase, material waste due to inexperience, and the potential need for future repairs. Conversely, hiring professionals like TTIS ensures the job is done right the first time, with workmanship guaranteed and even better we warranty all of our installations for as long as you own your home. 

When to hire a pro

So, when should you definitely call in a pro? Jobs that demand waterproofing expertise, such as showers and outdoor tiles, large areas, and complex patterns or materials, are best handled by professionals. Not only for the sake of quality but for ensuring the longevity of your investment. Imperfect tiling can lead to water damage, loose tiles, and costly repairs down the line.

FAQ

Q: Do you know how many inches of subfloor is required by code in Edmonton for a tiled system on your floors? A: A minimum of 1 1/4″ is required

Q: Do you know how to plan a layout? Small cuts on the edges is not acceptable. Watch for “U” cuts in certain sections because it isn’t always possible. Also for “L” cuts. Symmetry is a must. What are you willing to live with for the next 20-30 years of your life? A: If the answer is yes. Check pattern both ways. Check size tile (12×12 or 12×24 or hexagonal 8×9), pattern install (70×30, stacked, side to side or front to back), Grout size line, and measure the pattern on repeat until edge of area. Spend the extra time here to avoid problems after you’ve place tile with mortar and its drying.

Q: Are you going to be renting the tools? Buying the tools? A: Unless you’re planning on becoming a tilesetter after you finish your project, this will increase the cost of the project a lot and then tools will collect dust in storage.

Q: Do you know what mortar to use depending on the location of the tile application? Different size tiles require different mortars. A: This is pretty self explanatory. Depending on size of tile and location of application there are mortars to make your life easier and also a best project outcome.

Q: Application on different substrates? What do you do if you’re going on top of linoleum? Particle board? Top of tile? A: Mortar has moisture and particle board likes moisture. You do not want to install on particle board. Remove and install appropriate substrate prior to tile install. Do not install on top of linoleum, unless proper testing and priming of the substrate is done first.

Q: What material to use in a shower application? Drywall? Mold resistant drywall? Tile backboard? Cement board? A: As long as there is a waterproofing membrane installed after the boarding of the shower, you are 100% good. You could save money if you just use a waterproofing board and then just apply sealer on the joints.

Q: Are you confidently willing to put thousands of dollars in tile and material on the line to potentially save some money? And your own valuable time? A: It is up to each one of you.

Q: Have you ever had a quick and easy weekend DIY project turn into a month long nightmare? I know we have a fair share of our own. It can be really stressful on a marriage. A: How much do you value your time? How much do you value your marriage? These are really important before you jump into a DIY tile setting project.

Q: Why is tile installation so expensive? A: Tile installation extends far beyond the simple act of laying tiles. It involves a thorough and detailed process in which the tilesetter meticulously covers the designated area a minimum of seven times from start to finish, ensuring that the installation meets the highest standards of quality. This degree of scrutiny is a bare minimum and does not even take into account the added complexity when opting for intricate designs like chevron, herringbone, or complex multi-size tile patterns. Moreover, it’s important to recognize that tile laying is not just a task but an art form that demands specialized skills, precision, and a keen eye for detail. The process is elaborate and demands significant time investment, with a focus not only on ensuring the structural integrity of the installation but also on achieving a level of aesthetic excellence that complements the overall design vision. Rest assured, our commitment to these principles ensures that your tile installation will not only last but will also be a visual delight.

Conclusion: DIY Tile Installation

To sum up, DIY tile-setting can be a rewarding project for those with the time, tools, and modest ambition. However, the assurance of quality, efficiency, and expertise often makes the investment in professional services worthwhile, particularly in complex projects or high-stake areas of your home. At TTIS, we believe in doing it right while delivering beautiful, lasting results. You can find us on Facebook, Instagram, TikTok, and Youtube. Our website is full of resources for all of the DIY folks out there because we do want you to attempt it. BUT Remember… just because you can doesn’t mean you should.

Enhance your kitchen with a stunning tiled backsplash by the specialists

Our experience with The Tile Installation Specialists was absolutely fantastic. They were quick to provide an accurate quote and answer any questions we had. We were booked in quickly and Ewald was always on time. Ewald was very clean and precise. I’m certain he left our house cleaner than when he found it. Our new backsplash is flawless and our kitchen now feels like home!

Google Review from Ashley B.

Transforming your kitchen can be as simple as adding a beautifully tiled backsplash. This small change can make a significant difference in the overall look and feel of your kitchen. If you’re new to tile installation, don’t worry—we’re here to guide you through the process.

At The Tile Installation Specialists, we’ve helped thousands of clients achieve their dream kitchen by installing stylish and functional backsplashes. Let’s take a closer look at how we turn your vision into reality:

Demolition & Preparation

  • We start by removing the old tiles and ensuring a clean slate. Our team takes care of disposing of the old materials and prepping the area for the new installation. Any necessary repairs, such as fixing the vapor barrier, are also addressed during this phase.

Installation

  • With a fresh canvas in place, we begin installing the new tiles. For this project, our client opted for a classic 2-inch by 8-inch subway tile, adding a timeless touch to their kitchen.

Grouting and Sealing

  • Once the tiles are in place, we tidy up the workspace by removing spacers, wedges, and tape. Then comes the grouting stage, where we apply the grout and any caulking sealant needed for a polished finish. Depending on the type of tile used, we may also apply a sealant to enhance durability and longevity.

Curing Process

  • It’s important to note that after the installation, there is a curing period before the final sealant can be applied. This typically ranges from 3 to 29 days, ensuring that the tiles set properly and are ready for long-term use.

The entire process usually takes 2 to 3 days for an average-sized kitchen backsplash of around 30 to 35 square feet. The result? A stunning and functional addition to your kitchen that not only enhances aesthetics but also adds value to your home.

Ready to elevate your kitchen with a tiled backsplash? We, at The Tile Installation Specialists can do just that. Let’s get started on your kitchen transformation!

Why Should I Tile My Kitchen Backsplash?

Your kitchen is one of the most important spaces in your home, where you prepare meals and spend time with family and friends. As Tilers ourselves, we agree! It’s important that your kitchen reflects your personal style and makes you feel comfortable and at ease. One way to enhance the appearance of your kitchen is by installing a tile backsplash.

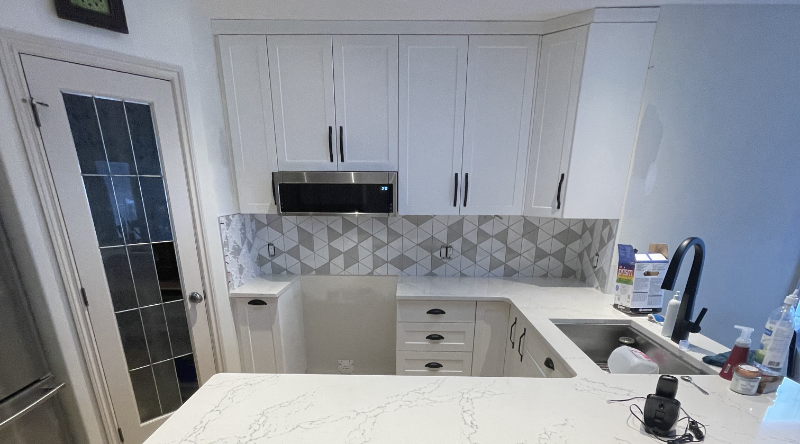
A backsplash is a vertical extension of the countertop that protects the wall from splatters and spills. A tile backsplash not only adds a protective layer to your kitchen but also enhances the aesthetics of the space. Here are some reasons why you should consider tiling your kitchen backsplash:

Kitchen Backsplash designed in house

Protects your walls

Cooking can be a messy affair, with oil, sauce, and other ingredients splattering all over the place. A tile backsplash acts as a barrier that protects your walls from damage caused by splatters and spills. It’s much easier to wipe down and clean a tiled surface than a painted or wallpapered wall.

Adds style and character

A tile backsplash can add a lot of style and character to your kitchen. Tiles come in a wide range of colors, patterns, and textures, which can complement or contrast with your existing décor. You can choose a neutral color to create a subtle backdrop for your kitchen, or a bold pattern to make a statement.

Easy to clean

Cleaning a tiled backsplash is easy and hassle-free. Tiles are non-porous, which means they don’t absorb moisture or stain easily. All you need is a damp cloth or sponge to wipe down the surface and keep it looking clean and fresh.

Enhances the value of your home

If you’re planning to sell your home in the future, a tile backsplash can increase its resale value. A well-designed and installed backsplash can be a major selling point for potential buyers, especially if it complements the overall style of the kitchen.

Budget-friendly

Tiling your kitchen backsplash can be a cost-effective way to update the look of your kitchen without breaking the bank. Tiles are available at a range of price points, so you can choose a style and quality that fits your budget.

In conclusion, tiling your kitchen backsplash is a great way to protect your walls, add style and character to your kitchen, make cleaning easier, enhance the value of your home, and do it all within a reasonable budget. So, if you’re looking to update your kitchen, consider installing a tile backsplash – you won’t regret it! Find a Tiler near you and get your project started. Or if you are going to do it yourself keep looking on our Blog